

PAY ATTENTION!
All seeds (except SOLD OUT) are available for immediate shipping and will be dispatched within 1-2 business days.
INFORMATION NEEDED? PLEASE CONTACT US NOW!
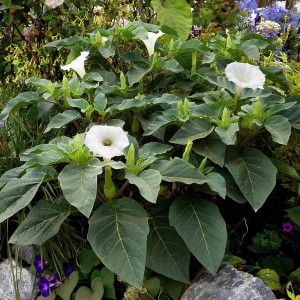
Introduced to Western gardens in 1816, this native of China is a rampant, hardy, deciduous woody vine that blooms showily in late spring with long hanging clusters of lightly fragrant pea-like flowers in lilac-purple or white, followed by hanging velvety green pods. The flowers open in unison, providing a spectacular display. The bright green pinnate leaves usually have 11 leaflets. This massive twiner can literally cover acres if allowed to romp freely. There are many cultivars, including white-flowered 'Alba' and the floriferous 'Prolific.'
This wisteria, like others, grows and blooms best in full sun and well-drained soil, and sometimes takes several years to flower. Soil that is too rich in nitrogen may promote leafage at the expense of flowers. Large and vigorous, Chinese wisteria needs a sturdy structure for support and pruning to keep it in bounds. It can be trained as a small tree by staking a shoot upright, removing side shoots and restraining the top shoots by pruning for several years until the stem is self-supporting. It is listed as invasive in several areas including the eastern United States.
Genus - Wisteria
Species - Sinensis
Common name - Chinese Blue Wisteria
Pre-Treatment - Not-required
Hardiness zones - 5 - 8
Height - 20-90' / 6 - 27 m
Plant type - Vine
Vegetation type - Deciduous
Exposure - Full Sun, Partial Sun
Growth rate - Fast
Soil PH - Acidic, Neutral
Soil type - Loam
Water requirements - Average Water
Landscape uses - Feature Plant, Screening / Wind Break, Vine
Bloom season - Late Spring, Early Summer, Summer
Leaf / Flower color - Green / Purple, Blue Violet
GERMINATION INSTRUCTIONS
1. Place the wisteria seeds on a flat surface. Scratch the outside seed coat two or three times on each side using a sharp knife. Do not cut deeply into the seed.
2. Fill a bowl with 1-cup warm water. Drop the seeds into the water. Push on any floating seeds gently with your finger to submerge them. Leave the seeds to soak for 24 hours.
3. Place 10 cm (4") plastic pots on a flat work surface, setting out one pot for every seed you intend to plant. Tamp down the potting soil firmly in each pot.
4. Fill each pot with water two or three times to moisten the soil. Allow any excess water to drain from the holes in the pots' bottom.
5. Cover a pot with a square of plastic wrap. Pull the sides of the plastic wrap down over the sides of the pot. Place a rubber band around each pot to hold the plastic wrap's edges in place. Repeat this process with each pot.
6. Place the pots in an area that receives bright, indirect sunlight. Choose a room with constant temperatures between +21-+24c (70-75F). Position the pots away from heating or cooling vent, fireplaces, heaters or air conditioners.
7. Check the pots every two or three days for signs of moisture loss. Remove the plastic wrap when the top layer of soil looks dry. Mist the soil with the misting nozzle or spray bottle. Replace the plastic wrap. Keep the soil evenly moist, but never soggy.
8. Remove the plastic wrap from its pot when a seedling appears above the soil level. Water the soil when the top 10-20 mm (1/2-1") begins to dry.
9. Transplant the seedlings into 15 cm (6") plastic pots full of potting soil, one plant per pot, when they develop two to three sets of leaves. (nfo: homeguides.sfgate.com)
No questions about this product.

